Hi there Laurel here. I just went through a big purge/organization of my scraproom (one of my projects every summer). Quite honestly I would love for my room to always be neat and tidy with things hidden away so it looked 'clean and crisp'. However, I am a visual person, in order for me to use it, I have to see it or I forget I have it (I know there are others like me out there!). One of the things I have had trouble with were my journal tags and such. I used to have them in plastic bags by manufacturer. But this was a problem because then when doing a page, I would have to search through them all to find things that would work. Not only was this time consuming, it made a mess and more often than not, I just didn't bother using the tags.
Then the envelope challenge gave me the push I needed to organize them better. I had a lot of 6
X 6 envelopes in my stash just taking up space. I tend not to make cards that big. So I decided to put them to better use. I labelled my envelopes (using a stamp set by TAWS) according to the occasion (summer, fall, love, abc, everyday, christmas, halloween... etc).
Now here is a hint for you: when stamping words with alphabet stamps and you have a word that uses a letter more than once but only one of the letters here is my trick: stamp the word from the end to the beginning - that way you can take away the letters you don't need and add more that you do. This also will make it so the word fits where you want it to. For example: on my 'summer' envelope I stamped 'mer' at the edge, took away the 'er' and added 'su' in front of the 'm' and then stamped the remainder of the word. Does that make sense?
I then sorted my journal cards and put them in the correct envelope. The envelopes are of course put into the container in alphabetical order so they are easy to find. Now when doing a page I will pull out the corresponding envelope and see what tags and such I can use.
Another hint: Now because I do things for publication I need to know where my items are from. Once they are out of the package, I may forget... so I stamped on the back of them some initials (ES = Elle's Studio; PLS = Pretty Little Studio; CT = Chic Tags...). No one will see this, so I wasn't worried about how perfectly I stamped.
Finally, I prefer to spend my money on craft supplies rather than on what to store them in so if I can find something inexpensive that works I am all for it. In this case I had a plastic eclair package hanging around that I knew would be useful one day. Today was the day ;) I am happy that it is white, so I left it... I like whiteness. Of course though, it wouldn't be complete with a bit of scrappy decoration... so I adhered some Black V Striped Twill to fancy it up. Easy Peesy!
Now there is room in the tub for more tags and such but not a lot.. so I either have to make sure I use them now or buy more eclairs so I have another tub, hehehe!
I am sure you find lots of these in your mail box....
I took 6 of them, trim both ends, and then fold it this way, kind of have a longer side and a slightly shorter side
I use double-sided tape on the smaller side and stick all the envelopes together
you should have a book of envelopes with lots of pockets
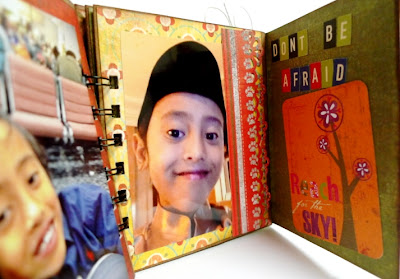
When I started this project, I have a mini album in mind, creating all the pockets where I can slot in photos, or tags but along the way, a little girl named Dolce came into my craft room, saw what I've done with all those envelope, she said: "Oh, I need a little book just like that, so I could keep all the poems I wrote in those pockets" Oh well, so I have to toss the mini album out of my window and make a little "Dolce's Poem Book" instead!
Of course she now want to have some say on the patterned paper I pick out to dress up the pockets in the envelope book
the last step is to make a chipboard cover for this book
and now this is officially "Dolce's Poem Book"
So come play along!
Hello there! This is
Yvonne. I love using envelopes on mixed media projects instead of wasting pretty patterned paper that would be painted over. Plus, I love the shaped edges of envelopes! :)
I created a 6 x 6 canvas as a birthday present for a friend *winks*. I used chipboard negatives, envelopes, texture paste, crackle paint, stickles and various inks and paints for the base.
Can you spot where the envelopes are? [the little brown bits on the base!]
I also handmade a bloom using remnant lace, felt and pearls. :)
We would love to see your take on LESSology Challenge #17: Fun with envelopes! :)
